Use the Models  Yard Models Yard Models view (on page 1) to list all the available yard models.
The basic implementation of the AGV zones creates only one zone for each point of work (POW). Usually, all ASCs belong to the same POW, the Yard POW. Therefore, with the basic implementation all ASCs are included in a single zone. This results in all the waterside and landside transfer zones (TZs) to be included in the same zone too.
Disadvantages of using the basic AGV zones
When the whole yard is represented as one huge zone, it is not possible to:
Realize and control congestion efficiently.
Make optimal parking decisions.
Advantages of using advanced AGV zones
Using advanced AGV zones enables you to split the yard into zones that are of a manageable size. You can set up advanced AGV zones by grouping transfer zones and stack blocks that are geographically close to each other.
Setting up the advanced AGV zones enables you to efficiently realize and control congestion and make optimal parking decisions for AGVs. The advanced zoning enables you to divide the yard into zones of a manageable size. You may divide the yard into the following types of zones:
ASC
Quay
Rail
Road
You can use the Yard Editor to implement the advanced AGV zones for your yard.
POWs that do not have active work queues are not considered in the zoning logic of the AGV Scheduler (for performance reasons). However, the AGV Scheduler considers the non-QC POWs (for parking reasons) in the zoning logic.
To set up advanced AGV zones for ASCs:
Open the N4 Yard Editor for your terminal:
http://[cluster_node_name_or_load-balancer_IP]:9080/apex/yard.zul
Log in with administrative permissions.
Navis recommends that you log in at the Yard scope level.
Use the Models Yard Models Yard Models view (on page 1) to list all the available yard models.
The Yard Models view lists all of the yards you have created. Only one is active, as indicated by the mark in the Active column. The Yard Editor allows changes only to inactive yards.
It is best practice to create and maintain both a backup for your active yard and a clone of your active yard in the Yard Models view. When you need to make changes to a yard that is active, you modify the clone of the active yard. For more information, see Yard Models view (on page 1) in the Yard Editor Help.
In the list view, select the inactive yard model you want to use to set up and test the AGV zones.
Select the Actions Open Yard Editor option.
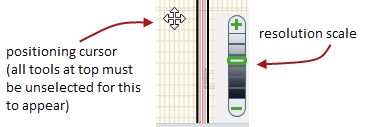
In the N4 Yard Editor view, use the resolution scale and the positioning cursor to zoom in on the point in the yard where the transfer zones and ASC block are located.
Use the Yard Path tool to draw a path between a transfer zone served by AGVs and a stack block.
The transfer zone stack block should be of type Transfer Zone - Straddle and must be served by AGVs. For more information on setting up transfer zone (TZ) association, see Transfer Zone Association form (on page 1) in the Yard Editor Help.
In the Transfer Zone Association form, use the Group Name field to create the advanced AGV zones.
You can either use an existing group name or add a new group name based on your requirements.
To edit the group name for an existing TZ association, you can right-click the TZ association and select the Update Transfer Zone Association option.
For example, you can create a group for all the transfer zone blocks and stack blocks that are served by a couple of ASCs and are geographically close to each other.
By assigning a group to each TZ association, you split the whole yard into manageable smaller zones.
For quay cranes (QC), each QC has two blocks of type Transfer Zone: one to represent the QC platform and another to represent the actual transfer zone. When using the basic AGV zones, a QC TZ is associated with the QC CHE using the CHE zone association.
However, when using the advanced AGV zones, Navis recommends that you use the transfer zone association to associate a TZ to a QC. See Create the QC transfer zone (on page 1) for instructions.
To set up advanced AGV zones for QCs:
In the Yard Editor, use the Non-Stack Block tool to draw a non-stack block to represent the quay side.
In the Non-Stack Block form, select the Block Type as Heap.
Use the Yard Path tool to associate the TZs for all the QCs to the new non-stack block of type Heap that represents the quay side.
N4 displays the Transfer Zone Association form (on page 1).
In the Transfer Zone Association form, use the Group Name field to create a group that identifies an AGV zone for all the QCs and the TZs associated with the QCs.
If you want to create a separate zone for each QC, you must use a different group name for each QC TZ association.